25.1 Objective
The previous chapters designed the complete ACAI architecture.
Now we move from:
ARCHITECTURE
to:
ACTUAL APPLICATION
The implementation target is:
Next.js
+
TypeScript
+
Tailwind CSS
+
Backend APIs
+
Database
+
AI Gateway
+
RAG
+
Agent
+
Tools
+
Storage
+
Authentication
The important rule is:
BUILD SMALL
 ↓
TEST
 ↓
CONNECT
 ↓
TEST AGAIN
 ↓
EXPAND
Do not create every advanced feature simultaneously.
25.2 Final Application Architecture
                         ACAI APP
                            │
             ┌──────────────┴──────────────┐
             ▼                             ▼
         FRONTEND                       BACKEND
             │                             │
     ┌───────┼────────┐            ┌───────┼────────┐
     ▼       ▼        ▼            ▼       ▼        ▼
   Chat    Media   Dashboard      Auth    APIs     Jobs
     │       │        │            │       │        │
     └───────┼────────┘            └───────┼────────┘
             │                             │
             └──────────────┬──────────────┘
                            ▼
                       AI GATEWAY
                            │
             ┌──────────────┼──────────────┐
             ▼              ▼              ▼
          GENERAL          CODE          VISION
           MODEL           MODEL          MODEL
             │              │              │
             └──────────────┼──────────────┘
                            ▼
                          AGENT
                            │
                 ┌──────────┼──────────┐
                 ▼          ▼          ▼
                RAG       TOOLS      MEMORY
                 │          │          │
                 └──────────┼──────────┘
                            ▼
                   DATABASE / STORAGE
                            │
                            ▼
                        MONITORING
25.3 Recommended Project Structure
The project can begin with:
acai/
│
├── src/
│   ├── app/
│   │   ├── page.tsx
│   │   ├── dashboard/
│   │   ├── chat/
│   │   ├── image/
│   │   ├── video/
│   │   ├── documents/
│   │   ├── settings/
│   │   └── api/
│   │
│   ├── components/
│   │   ├── ui/
│   │   ├── chat/
│   │   ├── media/
│   │   └── dashboard/
│   │
│   ├── lib/
│   │   ├── ai/
│   │   ├── auth/
│   │   ├── db/
│   │   ├── rag/
│   │   ├── tools/
│   │   ├── storage/
│   │   └── utils/
│   │
│   ├── services/
│   │   ├── ai-service.ts
│   │   ├── rag-service.ts
│   │   ├── media-service.ts
│   │   └── user-service.ts
│   │
│   ├── types/
│   │   └── index.ts
│   │
│   └── config/
│       └── index.ts
│
├── public/
├── prisma/
├── tests/
├── .env.local
├── package.json
├── tsconfig.json
└── README.md
This is a starting structure rather than a requirement to use every directory immediately.
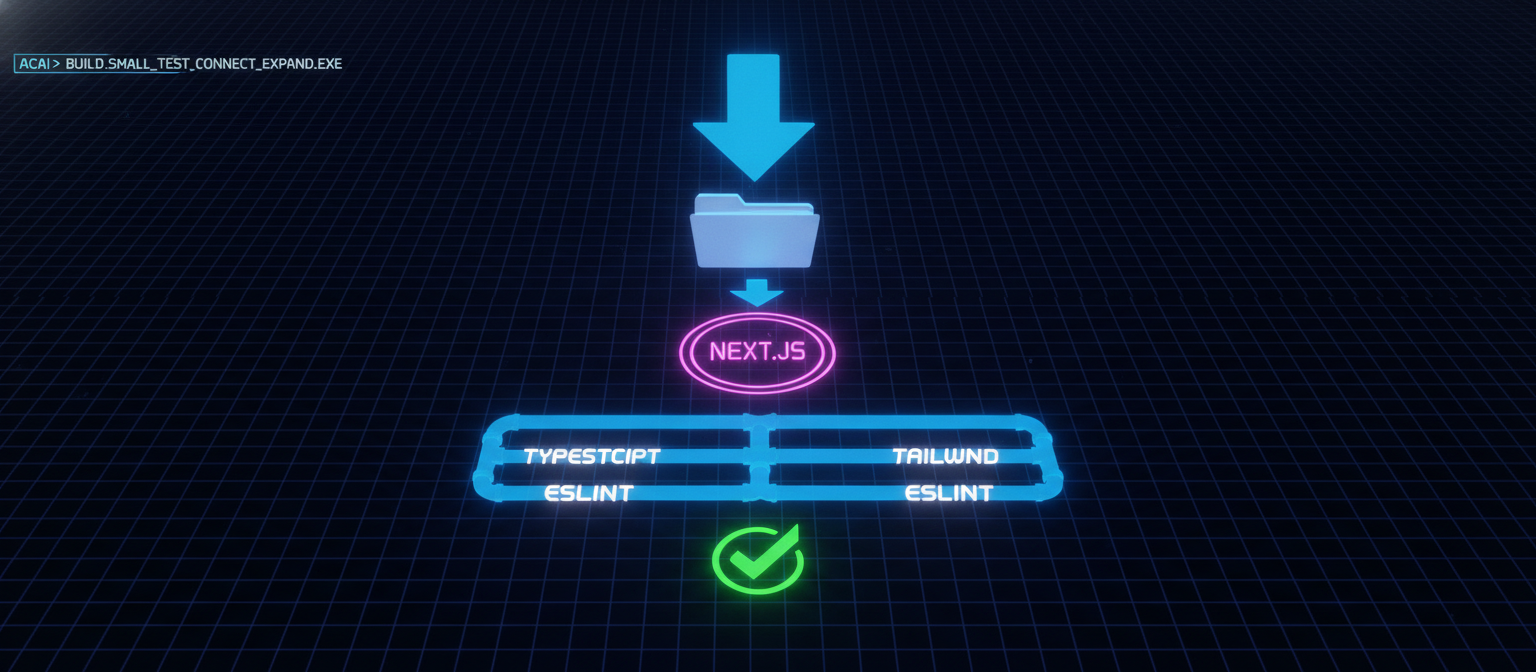
25.4 Create the Application
The first stage is creating a Next.js application.
Conceptually:
EMPTY FOLDER
     ↓
NEXT.JS PROJECT
     ↓
TYPESCRIPT
     ↓
TAILWIND
     ↓
ESLINT
The project should first be created and run successfully before adding AI functionality.
25.5 First Success Test
The first goal is extremely simple:
Browser
 ↓
localhost
 ↓
ACAI homepage
If the homepage works, continue.
If it does not:
STOP
 ↓
FIX PROJECT
 ↓
RUN AGAIN
Do not continue building on a broken foundation.
25.6 Environment Configuration
AI keys and database credentials belong in environment configuration.
Conceptually:
.env.local
may contain variables such as:
DATABASE_URL=...
AI_PROVIDER_KEY=...
STORAGE_KEY=...
AUTH_SECRET=...
Actual variable names should match the libraries and services selected for the project.
Never commit real production secrets to source control.
25.7 Environment Separation
Use:
Development
Staging
Production
Example:
Development
 ↓
Local database
Local/test AI configuration
 ↓
Staging
 ↓
Production
This prevents development experiments from directly affecting production.
25.8 Configuration Layer
Instead of reading environment variables everywhere, create a configuration layer.
Conceptually:
src/config/
    index.ts
It can expose validated configuration to the application.
Architecture:
ENVIRONMENT
 ↓
CONFIG
 ↓
SERVICES
25.9 Database Layer
The database stores application state.
Core tables:
users
projects
conversations
messages
files
generations
jobs
model_versions
usage
audit_events
The exact schema should evolve with actual features.
25.10 User Model
Conceptually:
User
----------------
id
email
name
role
status
createdAt
updatedAt
The user ID becomes the ownership boundary for personal resources.
25.11 Project Model
Project
----------------
id
userId
name
description
createdAt
updatedAt
A project can contain:
Conversations
Files
Generations
Settings
25.12 Conversation Model
Conversation
----------------
id
projectId
userId
title
createdAt
updatedAt
Messages:
Message
----------------
id
conversationId
role
content
createdAt
25.13 Database Relationship
USER
 │
 └── PROJECT
      │
      ├── CONVERSATION
      │       └── MESSAGE
      │
      ├── FILE
      │
      └── GENERATION
This makes ownership easier to enforce.
25.14 Authentication Integration
Authentication should happen before private application operations.
USER
 ↓
LOGIN
 ↓
SESSION
 ↓
DASHBOARD
Private API:
REQUEST
 ↓
AUTH CHECK
 ↓
AUTHORIZED?
 ├── NO → 401 / 403
 └── YES → CONTINUE
25.15 API Route Structure
Possible API organization:
api/
 ├── auth/
 ├── chat/
 ├── generate/
 ├── upload/
 ├── files/
 ├── conversations/
 ├── projects/
 ├── models/
 └── health/
Each endpoint should have:
Authentication
Validation
Business logic
Error handling
Logging
25.16 Chat API
The basic chat flow:
POST /api/chat
Conceptually:
USER MESSAGE
 ↓
AUTH
 ↓
VALIDATION
 ↓
CONVERSATION LOAD
 ↓
AI GATEWAY
 ↓
MODEL
 ↓
RESPONSE
 ↓
SAVE MESSAGE
 ↓
RETURN
25.17 AI Gateway
The AI gateway separates the application from individual model providers.
APPLICATION
     ↓
AI GATEWAY
     │
 ┌───┼────┐
 ▼   ▼    ▼
A    B    C
The application should ask:
generate(...)
rather than scattering provider-specific logic throughout the UI.
25.18 AI Gateway Responsibilities
Model selection
Provider selection
Authentication
Retries
Timeouts
Fallbacks
Usage tracking
Logging
Streaming
Error normalization
25.19 Provider Abstraction
Conceptually:
interface AIProvider {
    generate(...)
    stream(...)
}
Then:
Provider A
Provider B
Provider C
can implement the same conceptual interface.
The exact TypeScript API should be adapted to the selected SDKs.
25.20 Model Routing
The gateway can choose a model based on task:
TASK
 │
 ├── CHAT → GENERAL
 ├── CODE → CODE
 ├── IMAGE → VISION / IMAGE
 └── COMPLEX → LARGE MODEL
This prevents one model from handling every workload unnecessarily.
25.21 AI Request Object
A normalized internal request might contain:
model
messages
temperature/configuration
tools
retrieval context
user ID
request ID
The provider adapter translates this into the provider-specific format.
25.22 AI Response Object
Normalize provider responses:
output
model
usage
finishReason
requestId
metadata
Then the rest of ACAI does not need to know which provider generated the response.
25.23 Error Handling
Provider errors should become application-level errors.
PROVIDER ERROR
 ↓
AI GATEWAY
 ↓
NORMALIZE
 ↓
APPLICATION ERROR
Example categories:
TIMEOUT
RATE_LIMIT
AUTH_ERROR
INVALID_REQUEST
PROVIDER_UNAVAILABLE
UNKNOWN
25.24 Fallback
PRIMARY PROVIDER
       │
       ├── SUCCESS → RETURN
       │
       └── TEMPORARY FAILURE
                    ↓
                FALLBACK
                    ↓
                  RETURN
Fallback should not blindly retry every failure.
25.25 Chat Streaming
For a better interface:
USER
 ↓
API
 ↓
AI MODEL
 ↓
TOKEN STREAM
 ↓
CHAT UI
The user sees the answer appearing progressively.
25.26 Chat UI
The basic screen:
┌──────────────────────────────────────────┐
│ ACAI                                     │
├──────────────────────────────────────────┤
│                                          │
│ User: Explain this document              │
│                                          │
│ ACAI: Here is the explanation...         │
│                                          │
│                                          │
├──────────────────────────────────────────┤
│ Type your message...              [Send] │
└──────────────────────────────────────────┘
The UI can later become much more advanced.
25.27 Conversation Persistence
When the user sends:
Hello
the backend should:
1. Validate user
2. Load conversation
3. Save user message
4. Call AI
5. Save assistant response
6. Return response
This creates persistent chat history.
25.28 RAG Integration
Now connect the RAG system.
USER QUERY
 ↓
EMBEDDING
 ↓
VECTOR SEARCH
 ↓
AUTHORIZED RESULTS
 ↓
RERANK
 ↓
CONTEXT
 ↓
AI MODEL
25.29 Document Upload
The document flow:
USER
 ↓
UPLOAD
 ↓
AUTH
 ↓
VALIDATE
 ↓
STORAGE
 ↓
DATABASE RECORD
 ↓
PROCESSING JOB
25.30 Document Processing Worker
QUEUE
 ↓
DOCUMENT WORKER
 ↓
EXTRACT TEXT
 ↓
CLEAN
 ↓
CHUNK
 ↓
EMBED
 ↓
VECTOR DATABASE
The web server should not perform heavy processing synchronously when a worker architecture is more appropriate.
25.31 Chunking
A document becomes:
DOCUMENT
 ↓
CHUNK 1
CHUNK 2
CHUNK 3
...
CHUNK N
Each chunk can contain metadata:
documentId
page
section
tenant/user
source
25.32 Retrieval Authorization
Before returning retrieved content:
QUERY
 ↓
USER ID
 ↓
PERMISSION FILTER
 ↓
VECTOR SEARCH
 ↓
AUTHORIZED RESULTS
This is essential for private documents.
25.33 RAG Context Builder
QUERY
 ↓
RETRIEVAL
 ↓
TOP RESULTS
 ↓
CONTEXT BUILDER
 ↓
MODEL
The context builder should include only relevant material.
25.34 Agent Layer
The agent sits above the model.
USER
 ↓
AGENT
 ├── Think / plan
 ├── Retrieve
 ├── Call tools
 └── Generate response
The exact reasoning implementation should remain controlled by the selected model and agent framework.
25.35 Tool Registry
Create a central tool registry:
TOOLS
 ├── search
 ├── calculator
 ├── document_search
 ├── image_generation
 ├── file_reader
 └── media_processor
The agent can select from allowed tools.
25.36 Tool Execution Pipeline
MODEL
 ↓
TOOL REQUEST
 ↓
SCHEMA VALIDATION
 ↓
AUTHORIZATION
 ↓
RATE LIMIT
 ↓
TOOL
 ↓
RESULT
 ↓
MODEL
Never allow the model to bypass server-side permission checks.
25.37 Calculator Tool
For deterministic calculations:
USER
 ↓
AGENT
 ↓
CALCULATOR
 ↓
RESULT
 ↓
AGENT
 ↓
USER
This is more reliable than expecting the language model to perform every numerical operation itself.
25.38 Search Tool
USER
 ↓
AGENT
 ↓
SEARCH
 ↓
RESULTS
 ↓
RERANK / FILTER
 ↓
AGENT
External search results should be treated as untrusted information.
25.39 Memory
ACAI can maintain multiple memory layers:
Conversation Memory
Project Memory
User Preferences
Long-Term Knowledge
Architecture:
USER
 ↓
MEMORY RETRIEVAL
 ↓
AGENT
 ↓
RESPONSE
Only authorized data should be retrieved.
25.40 Media System
ACAI's media layer can support:
Image upload
Image enhancement
Background removal
Image generation
Video processing
Video generation
Audio processing
The frontend sends requests to backend services.
25.41 Image Generation Flow
USER PROMPT
 ↓
AUTH
 ↓
VALIDATION
 ↓
AI GATEWAY
 ↓
IMAGE MODEL
 ↓
OUTPUT
 ↓
STORAGE
 ↓
DATABASE
 ↓
UI
25.42 Video Generation Flow
Video jobs are often longer:
USER
 ↓
CREATE JOB
 ↓
QUEUE
 ↓
VIDEO WORKER
 ↓
MODEL / PROCESSING
 ↓
OUTPUT
 ↓
STORAGE
 ↓
JOB COMPLETE
 ↓
UI
25.43 Job Status
Frontend can display:
QUEUED
PROCESSING
COMPLETED
FAILED
Example:
Video generation
████████████░░░░ 75%
Processing...
The percentage should only be shown when the backend has meaningful progress information; otherwise use a status indicator rather than inventing progress.
25.44 Storage Integration
Generated output:
MODEL
 ↓
FILE
 ↓
OBJECT STORAGE
 ↓
FILE RECORD
Database:
generation
 ├── id
 ├── userId
 ├── status
 └── outputKey
Storage:
generated/
   user/
      generation/
         output
25.45 Dashboard
The dashboard becomes the central control panel.
┌─────────────────────────────────────────────┐
│ ACAI                                        │
├─────────────┬───────────────────────────────┤
│ Dashboard   │ Welcome back                  │
│ Chat        │                               │
│ Images      │ Recent Projects               │
│ Videos      │                               │
│ Documents   │ Recent Generations            │
│ History     │                               │
│ Settings    │                               │
└─────────────┴───────────────────────────────┘
25.46 Feature Navigation
Possible navigation:
Home
Chat
Image Studio
Video Studio
Documents
Projects
History
Settings
Keep the first version simple.
25.47 API Security
Every private API should follow:
REQUEST
 ↓
AUTH
 ↓
AUTHORIZATION
 ↓
VALIDATION
 ↓
RATE LIMIT
 ↓
BUSINESS LOGIC
25.48 Request IDs
Every request can receive a unique ID:
requestId
Then:
Frontend
 ↓
API
 ↓
Agent
 ↓
Model
 ↓
Database
can all be connected through the same request identifier in logs.
25.49 Usage Tracking
Each AI request can record:
userId
model
provider
tokens
latency
cost metadata
requestId
timestamp
This supports:
Usage dashboard
Quota enforcement
Cost analysis
Debugging
25.50 Admin Dashboard
Later, administrators can see:
Users
Requests
Errors
Models
Usage
Jobs
System health
Security events
Admin permissions must be strictly protected.
25.51 Health Endpoint
Create a basic:
GET /api/health
Conceptually:
{
  "status": "ok"
}
A more detailed readiness endpoint can verify required dependencies.
25.52 Testing Strategy
Test in this order:
1. Homepage
2. Authentication
3. Database
4. Chat API
5. AI gateway
6. Chat UI
7. File upload
8. RAG
9. Agent
10. Tools
11. Image generation
12. Video jobs
13. Monitoring
Do not debug ten systems at once.
25.53 End-to-End Chat Test
Test:
LOGIN
 ↓
OPEN CHAT
 ↓
SEND MESSAGE
 ↓
API
 ↓
AI GATEWAY
 ↓
MODEL
 ↓
SAVE MESSAGE
 ↓
DISPLAY ANSWER
If all stages succeed:
CHAT FEATURE = WORKING
25.54 End-to-End RAG Test
LOGIN
 ↓
UPLOAD DOCUMENT
 ↓
STORAGE
 ↓
QUEUE
 ↓
PROCESS
 ↓
EMBED
 ↓
VECTOR DB
 ↓
ASK QUESTION
 ↓
RETRIEVE
 ↓
MODEL
 ↓
ANSWER
25.55 End-to-End Media Test
LOGIN
 ↓
UPLOAD / PROMPT
 ↓
CREATE JOB
 ↓
QUEUE
 ↓
WORKER
 ↓
AI PROCESS
 ↓
STORAGE
 ↓
DATABASE
 ↓
FRONTEND
25.56 Build Order
The recommended implementation sequence is:
PHASE 1
Project

PHASE 2
UI

PHASE 3
Authentication

PHASE 4
Database

PHASE 5
Basic API

PHASE 6
AI Gateway

PHASE 7
Chat

PHASE 8
Storage

PHASE 9
Documents

PHASE 10
RAG

PHASE 11
Agent

PHASE 12
Tools

PHASE 13
Media

PHASE 14
Queues / Workers

PHASE 15
Monitoring

PHASE 16
Security hardening

PHASE 17
Deployment
25.57 Why This Order?
Because each stage depends on previous foundations.
For example:
RAG
 ↓
needs
 ↓
Database + Storage + Embeddings
and:
Agent
 ↓
needs
 ↓
AI Gateway + Tools + RAG
Therefore the dependency graph matters.
25.58 Dependency Graph
PROJECT
   ↓
UI
   ↓
AUTH
   ↓
DATABASE
   ↓
API
   ↓
AI GATEWAY
   ↓
CHAT
   ↓
STORAGE
   ↓
DOCUMENTS
   ↓
RAG
   ↓
AGENT
   ↓
TOOLS
   ↓
MEDIA
   ↓
QUEUE
   ↓
MONITORING
   ↓
DEPLOYMENT
25.59 Minimal Viable ACAI
Do not start with every feature.
The first useful version can be:
[✓] Login
[✓] Dashboard
[✓] Chat
[✓] AI Gateway
[✓] Conversation history
[✓] Basic file upload
[✓] Basic RAG
Then add:
Image
Video
Advanced Agent
More Tools
Billing
Teams
25.60 MVP Architecture
                    ACAI MVP
                       │
            ┌──────────┴──────────┐
            ▼                     ▼
        NEXT.JS                BACKEND
            │                     │
            ▼                     ▼
          CHAT                 AI GATEWAY
                                  │
                                  ▼
                                MODEL
                                  │
                                  ▼
                              DATABASE
                                  │
                                  ▼
                               STORAGE
This is far easier to build and test than the complete enterprise architecture immediately.
25.61 Production Architecture
After the MVP works:
                         USERS
                           │
                           ▼
                        FRONTEND
                           │
                           ▼
                     API / GATEWAY
                           │
                 ┌─────────┼─────────┐
                 ▼         ▼         ▼
               AUTH       API      WEBSOCKET
                           │
                           ▼
                         AGENT
                           │
              ┌────────────┼────────────┐
              ▼            ▼            ▼
             RAG          TOOLS        MODELS
              │            │            │
              └────────────┼────────────┘
                           ▼
                         QUEUE
                           │
                    ┌──────┼──────┐
                    ▼      ▼      ▼
                  WORKER WORKER WORKER
                    │      │      │
                    └──────┼──────┘
                           ▼
             ┌─────────────┼─────────────┐
             ▼             ▼             ▼
          DATABASE      VECTOR DB      STORAGE
                           │
                           ▼
                          CACHE
                           │
                           ▼
                      MONITORING
25.62 Deployment
When the application passes testing:
CODE
 ↓
GIT
 ↓
CI
 ↓
TEST
 ↓
BUILD
 ↓
STAGING
 ↓
VERIFY
 ↓
PRODUCTION
Deployment should use environment-specific configuration.
25.63 Rollback
If the new release breaks production:
VERSION 2
 ↓
PROBLEM
 ↓
ROLLBACK
 ↓
VERSION 1
Never deploy without knowing how to return to the previous working version.
25.64 Final Integration
At the end of this chapter:
                       USER
                         │
                         ▼
                    ACAI FRONTEND
                         │
                         ▼
                   AUTHENTICATION
                         │
                         ▼
                      API LAYER
                         │
                         ▼
                    AI GATEWAY
                         │
               ┌─────────┼─────────┐
               ▼         ▼         ▼
            GENERAL     CODE      VISION
             MODEL      MODEL      MODEL
               │         │         │
               └─────────┼─────────┘
                         ▼
                       AGENT
                         │
            ┌────────────┼────────────┐
            ▼            ▼            ▼
           RAG          TOOLS       MEMORY
            │            │            │
            └────────────┼────────────┘
                         ▼
                       QUEUE
                         │
                         ▼
                      WORKERS
                         │
            ┌────────────┼────────────┐
            ▼            ▼            ▼
         DATABASE      VECTOR DB    STORAGE
                         │
                         ▼
                      MONITORING
                         │
                         ▼
                        USER
25.65 What Is Actually Required?
For a real first implementation, the minimum technical components are:
1. Computer
2. Node.js
3. VS Code or another editor
4. Next.js
5. TypeScript
6. Database
7. Authentication system
8. AI model/provider
9. Storage
10. Environment configuration
11. Git
12. Deployment platform
Advanced features can be added later.
25.66 What Does Not Need to Exist on Day One?
You do not need to immediately build:
❌ Custom foundation model
❌ Distributed GPU cluster
❌ Dozens of microservices
❌ Complex Kubernetes infrastructure
❌ Multiple vector databases
❌ Multiple queues
❌ Massive training pipeline
Start with a working system.
Then scale based on real requirements.
25.67 The Real Implementation Principle
The architecture may look enormous:
ACAI
├── AI
├── RAG
├── Agent
├── Tools
├── Media
├── Database
├── Storage
├── Queue
├── Security
└── Monitoring
But implementation should happen incrementally:
STEP 1
Make app run.

STEP 2
Make login work.

STEP 3
Make database work.

STEP 4
Make one AI request work.

STEP 5
Make chat work.

STEP 6
Make file upload work.

STEP 7
Make RAG work.

STEP 8
Make one tool work.

STEP 9
Make agent work.

STEP 10
Add media.

STEP 11
Add workers.

STEP 12
Add monitoring.

STEP 13
Deploy.
25.68 Chapter 25 Success Criteria
[✓] Application structure
[✓] Next.js frontend
[✓] TypeScript
[✓] Environment configuration
[✓] Database architecture
[✓] Authentication
[✓] API architecture
[✓] AI gateway
[✓] Provider abstraction
[✓] Model routing
[✓] Fallback concept
[✓] Chat
[✓] Streaming concept
[✓] Conversation persistence
[✓] Document upload
[✓] Storage
[✓] RAG
[✓] Vector retrieval
[✓] Agent
[✓] Tool registry
[✓] Tool validation
[✓] Memory concept
[✓] Image workflow
[✓] Video workflow
[✓] Queue
[✓] Workers
[✓] Usage tracking
[✓] Monitoring
[✓] Testing
[✓] MVP architecture
[✓] Production architecture
[✓] Deployment sequence
[✓] Rollback
25.69 Final Result
At this point, ACAI is no longer just an idea on paper.
The architecture can be converted into an actual software project through a controlled sequence:
EMPTY FOLDER
     ↓
NEXT.JS
     ↓
UI
     ↓
AUTH
     ↓
DATABASE
     ↓
API
     ↓
AI GATEWAY
     ↓
CHAT
     ↓
STORAGE
     ↓
RAG
     ↓
AGENT
     ↓
TOOLS
     ↓
MEDIA
     ↓
QUEUE
     ↓
MONITORING
     ↓
SECURITY
     ↓
DEPLOYMENT
     ↓
REAL ACAI APPLICATION
The most important lesson is:
DO NOT TRY TO BUILD EVERYTHING AT ONCE.

BUILD ONE WORKING LAYER,
TEST IT,
THEN CONNECT THE NEXT LAYER.
That approach makes a large AI platform manageable.
25.70 Next Chapter
Chapter 26 — Actual Code Implementation: Starting From an Empty Folder, Installing Dependencies, Creating the Project Structure, Environment Setup, Database, Authentication, AI Gateway, and First Working Chat
The next chapter moves from architecture into actual code-level implementation.
The sequence will be:
EMPTY FOLDER
 ↓
CREATE NEXT.JS APP
 ↓
INSTALL PACKAGES
 ↓
CREATE FOLDERS
 ↓
CONFIGURE ENVIRONMENT
 ↓
CONNECT DATABASE
 ↓
CREATE AUTH
 ↓
CREATE AI GATEWAY
 ↓
CREATE CHAT API
 ↓
CREATE CHAT UI
 ↓
RUN LOCALLY
 ↓
TEST
The focus will be on making the first real ACAI feature work from beginning to end, rather than only describing the architecture.
End of Chapter 25


Comments
Post a Comment